Source: macworld.com
Five overlooked abilities of the Finder's Path Bar

Open a Finder window (Finder > New Finder Window) and then chooseView > Show Path Bar. The Path Bar appears at the bottom of all your Finder windows, showing the complete path from your computer to the current folder. (A path is the series of subfolders that leads to a specific folder or file.)
This is the only way you can see a folder’s path when a Finder window is in the background, but that’s merely the most obvious of the conveniences the Path Bar provides.
1. Access folders in the path
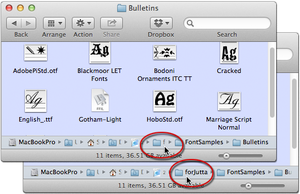
Is the path too long for its folder names to show? Just point—no clicking necessary—to a truncated name, and it expands so that you can read it. This point-and-expand technique works even on background windows, whether you’re in the Finder or in another app. Double-click a folder in the Path Bar to see its contents in the current window. Or, open a folder into a separate window with a Command-double-click on its miniature in the Path Bar.
2. Drag a file or folder into the Path Bar to move it
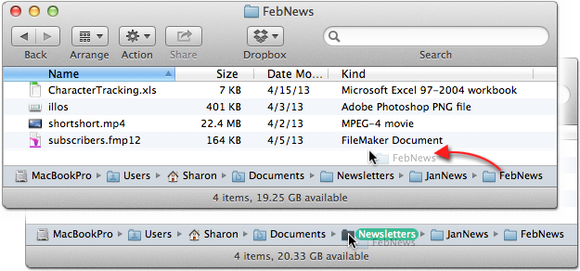
You can save a lot of window-juggling and folder-opening by dragging things directly into Path Bar folders. Notice a document or folder in the current window that should be elsewhere in the hierarchy? Simply move it into the appropriate folder in the Path Bar (something you can’t do with the Path menu available from a Command-click on the window’s title). You can even drag an item from one window into another window’s Path Bar; just hover over the target folder a moment so that the window you’re dragging to becomes active.
3. Drag a folder out of the Path Bar to move it
You can manipulate the folder icons in the Path Bar in many of the same ways you work with folders in windows.
Drag a Path Bar folder into any other folder or window, or onto the Desktop. You can even hold down Option as you drag to make a copy of the folder, or Command-Option to make an alias. Want to access one of those Path Bar folders frequently? Drag it into the sidebar. As with standard folder icons, if you drop a Path Bar folder in the wrong place, use Edit > Undo Move (Command-Z) to put it back. Or, if you change your mind while you’re dragging the folder (when making an alias or copy, for example), press Esc to cancel the operation, and the “drag ghost” disappears from the arrow pointer.
4. Drag a folder within the Path Bar to move it
Working with files in the Path Bar can be a big timesaver. Say, for instance, you notice that something is in the wrong place in the path (you put FebNews inside JanNews instead of inside the parent folder Newsletters). You can fix everything within the Path Bar just by moving the FebNews folder icon into the Newsletters folder icon.
5. Navigate search windows with the Path Bar
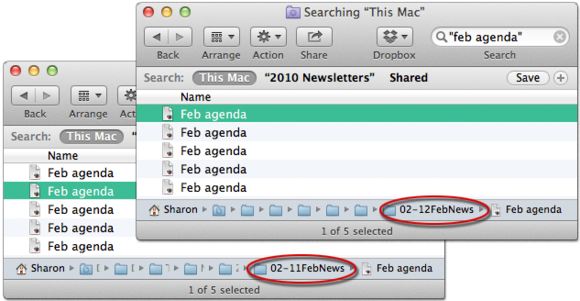
The Path Bar is an everyday, every-window convenience, but is especially useful in Finder search windows. While a standard window displays the contents of a single folder and the Path Bar shows its path, a search window lists items from all over the place, and its Path Bar shows you where any selected item lives. (If you make multiple selections, the Path Bar cleverly shows the nearest folder that they all have in common.)
So, if you get a dozen hits for, say, FebNews, you can select each one in turn to see its path. When you find the one you want, you can check what else is in its folder by double-clicking that folder in the Path Bar or—even better in most circumstances—using a Command-click to open it in a separate window, keeping your found list at hand so that you can check the other items.
No comments:
Post a Comment